
Singularity - Nameless Island
More actions
Overview:
- Base level 260+
- No pre-quest needed
- Cooldown: reset 4AM
- Time limit: 3 hours
- You can speed up the instance room clearing with more party member. The faster you clear the room your party will receive more rewards.
Floor 1
| 1 | 
|
Talk to Huginn at /navi ve_fild07 128/133 and make sure all your party member is at least level 260 or more.
There are two modes for the instances: Normal and Inferno. |
| 2 | 
|
Talk again to Hugin inside and let the Party Leader go to the portal first to unlock the warp portal.
You party have 3 hours max to finish the instances. |
| 3 | 
|
Kill the monster on each room to activate the warp portal to the other room.
You or your party member must collect the Key that scattered across the island. Once your party member opens the locked portal, other party member can go inside the portal even if they don't have the Key. When killing the monster, there's small chance to gain |
| 4 | 
|
You need to come closer to take the Key. Once you obtain the Key, you will be able to unlock the locked rooms.
For detailed Key location, please keep reading. Need at least one-party member to finish the hunting quest on each floor, killing 100 monsters! The hunting quest will be count as party efforts, and your party member will compensate equally during the rewards distribution at the end. |
| 5 | 
|
Kill all the monsters then move on the next room. You might face the Guardian along the way. Kill the Guardian and it will increase your point later. Some room have monster that can reflect your magical attack and reduce incoming long-range attack, just pay attention to the room that colored red. |
| 6 | 
|
Once you collect all the Key and kill the monster, head to the Outer Gate, for this island, all your party member need to collect the Outer Gate Key to be able to enter the castle.
Beware of the Gluttony Ragged Zombie, they have long ranged damage and can attack you with increadible ASPD. |
| 7 | 
|
There's two Boss inside the Outer Gate. You don't have to deal with them now or completely ignore them. But if you decide to summon the Boss, you will be granted for points and the reward distribution. Only the Party Leader can summon the Boss.
Whichever you decide, you may proceed inside the castle. |
 Nameless Island - Floor 1 legend
| ||
Floor 2
| 1 | 
|
Inside the Castle, same as before, kill all the monster. Started from here, you don't have to kill at the monster or take all the Key.
But if you want the maximum number of rewards, then you can do it. At the first room, you will see Statue of the Recording. Later, after you do some offering (Pumpkin and Wine), you can use this Statue as teleportal device to Floor 2 or Floor 3. Details will be revealed below. |
| 2 | 
|
There's trap on some area. They will cast strong skills within their walkable area, try to avoid them. When you get hit by the trap, you might lose some HP. |
| 3 | 
|
There's an area where you'll find an area full of Hell Poodle that got blocked by fences. If you choose to let them out, Hell Poodle will spawn at Floor 1 (that you already cleared) and Floor 2 (they will appear among the normal monster on all rooms).
If your party able to kill 100 Hell Poodle, you can summon the Boss, Gluttony Enhanced Hell Poodle. FYI, Hell Poodle got magic reflect and long-range reduction, if you plan to do this gimmick, you might want to clear the 2nd floor first before summoning them. |
| 4 | 
|
You may collect Pumpkin and the Wine. The room where they located are locked. If you plan to do this, make sure you already take the Pumpkin Storage Key and Wine Warehouse Key from the 1st floor earlier. |
| 5 | 
|
There's statue where you can offer the Pumpkin (2nd floor), and Wine (3rd floor). Once your party did the offering, the statue become a teleportation device. So, you can jump back and forth if you need it. |
| 6 | 
|
Whether you want to clear all the room or not, if you ready to progress to the 3rd floor, enter the Basement, make sure you already collect the Basement Key on 1st floor earlier. |
 Nameless Island - Floor 2 legend
| ||
Floor 3
| 1 | 
|
You'll see area with lots of Angel Statue. Each statue can bless you and people near them with specific blessings.
All party members can trigger the blessings. If you choose Green Blessing, you and people near the statue will receive Green Blessing. Make sure to not walking around while receiving the blessing. If you are walking across other statue area while other player activates another blessing, your blessing may get replaced. If you receive Green Blessing, you can only pass warp portal with Green Aura. If you wish to enter portal with another color, you need to walk back to this statue area and activate another blessings. |
| 2 | 
|
If you do the instances with party, you can select different task so you can clear the floor more efficiently. Again, you don't have to clear all the room, but if you want the full rewards, you might do so.
There's a hidden Boss that will spawn when you clear selected rooms. You may check them on the floor legend below. |
| 3 | 
|
The Gluttony Enhanced Necromancer will appear after you clear the specific sets of room (central purple colored room).
Killing this Boss will give you more reward at the Reward Room. Be aware that he will summon the minions, including the Gluttony Ragged Zombie. |
| 4 | 
|
There's also the Statue of the Recording for you to offer the Wine. This gimmick didn't give you additional reward if you do it, but it will save some walking time if you decide to summon the Gluttony Enhanced Hell Poodle. |
| 5 | 
|
The most important blessing is Creative Blessings (Cyan colored). This blessing located separated than the other blessings, inside locked room. So, you need to get the key before you able to enter the room. Once you get these blessings, you can go to the 4th floor. |
 Nameless Island - Floor 3 legend
| ||
Floor 4
| 1 | 
|
The main objective for this floor, to kill the MVP Hell Fly at the Northeast jail. But first, you need to collect the Cell Key 1~7 (all obtain from one area, at very Southwest room). Please check the floor legend at the bottom of the table. |
| 2 | 
|
There's 3 hidden Boss that you can kill too. But before the Boss can be summoned, you must clear series of room. After you arrive to the cell where the MVP located, summon the MVP and kill it. |
| 3 | 
|
Once the MVP killed, go to area near where you get the Cell Key. A Statue holds the power to warp you to the Hidden Chapel.
⚠️ If your party plan to summon the Hell Poodle or kill all the Boss, now it's the time ⚠️ After your party head to the Hidden Chapel, you can't go back to Floor 1~4. If you ready to fight the instances MVP, The Gluttony Fallen Bishop and or Gluttony Beelzebub (Inferno), chose the option to End the Exploration. Your party will be teleported back to the entrance. Go to warp portal once more and you will be warped to special area where you can go inside the Hidden Chapel. |
 Nameless Island - Floor 4 legend
| ||
Gluttony Fallen Bishop
   | |
| The fight will start once the Party Leader talked to the Gluttony Fallen Bishop. Here some instance gimmick that you need to aware. | |

|
♦️ Magic Circle
The magic circle will follow Gluttony Fallen Bishop wherever he walks. It will add a challenge for you to be able to hit the Fallen Bishop. Also, if any Player stand inside the magic circle, the MVP will receive Heal every seconds. If the MVP stop walking, he will cast Frost Field. |

|
♦️ Target Marker
While affected by this, you will receive more damage when the instance cast Seal Explosion and Lightning Judgement. |

|
♦️ Block Explosion / Lightning Judgement
You will receive more damage under Target Marker when you hit by these skills. |

|
♦️ Deadly Project
The instance will cast Deadly Project for all your party member from time to time. Even if you have immunity against magic, the immune effect will be reduced by these skills, makes you able to get hit by magical attack. |

|
♦️ Jack Frost
Random Jack Frost will continuously cast during the fight! Sometimes they appear 3 times in a row. |

|
♦️ Blue Dimension Rift
Gluttony Banshee will appear from the dimensional rift from time to time. When the Fallen Bishop entering the Stage, for 30 second, Gluttony Banshee will keep spawning from the rift continuously. Kill any Gluttony Banshee asap so it will not disturb you from killing MVP. |

|
♦️ Guardian Stone
During this stage, the MVP will cast RELIEVE ON lv 10 and makes them only receive small amount of damage. 4 Guardian Stone spawned at 4 corners of the map. Kill all of the Guardian Stone to remove the MVP shield. If the MVP come closer to the Guardian Stone, the power of the MVP will heal the Guardian Stone continuously, makes it impossible to be killed. Lure away the MVP from the Guardian Stone you want to kill. The Guardian Stone can only be hit with direct-normal attack. ⚠️ Be aware, there's invisible monster near the Guadian Stone, if you walk too close, they will hit you with direct attack with very high ASPD! |

|
♦️ Clear
The instance will try to remove any land skills Player casted during the fight from time to time. It makes Player need to re-cast protective skills like Land Protector. |
Gluttony Beelzebub
   | |
| The fight will start once the Party Leader talked to the Gluttony Fallen Bishop. Here some instance gimmick that you need to aware. | |

|
♦️ HP Leech
During the fight, your HP will constantly decrease. Make sure you bring enough healing pot or bring Cardinal to help you heal. |

|
♦️ Cursed Circle
The cursed circle will spawn below the Gluttony Beelzebub, then another 4 will appear randomly. The circle will repeat until the MVP died. Avoid this cursed circle at any cost, it will drain your HP fast and make you die in split second! |

|
♦️ Tarot of Confusion
Will makes your character Confuse at certain rate. |

|
♦️ Element Immunity
From time to time, the MVP will immune against random element attack. Pay attention to what the MVP immune against. |

|
♦️ Red Dimensional Rift
Same as the Blue one, instead of Gluttony Banshee, it will summon Gluttony Hell Fly. |

|
♦️ Hell Fire
Series of fire attack will appear on random location. Once the location chosen, it will cast these skills in order. |

|
♦️ Cane of Evil Eyes
Cane of Evil Eyes will appear on random location from time to time. |
Reward Arena

After you kill the MVP, Hugin will appear. If on inferno mode, you will receive 1 pc  Sealed Gluttony Crown after killing the Gluttony Beelzebub. After collecting the first reward, choose to go out to the Reward Room.
Make sure, a party member that collect 20 pcs of  Gluttony Energy talk to Hugin first to do the offering. This will add more reward for the additional reward. This only needed once per run.
Depends on how your party perform, Hugin will give points to your party instances exploration. Here's things that your party needs do to increase the points:
♦️ The amount of room cleaned
♦️ How fast your party finished
♦️ Other like, the amount of Mini Boss and Guardian killed
♦️ The fight with the MVP, how fast MVP killed, how many re-try (reset MVP battle), how many instance events triggered
And for the additional reward from Hugin, this hunting quest count as party efforts. If only one of you party member finished the hunting quest, it will be count as whole party efforts.
♦️ The amount of hunting quest for each floor completed
♦️ How many MVP killed
After calculate your party points, a Treasure will appear. Only party leader can open the Treasure. ⚠️ Bring Greed scroll to pick up the rewards.

Depends on the mode, as for additional reward from Hugin, your party will receive  Gluttony Fragment on Normal mode, and
  Gluttony Essence on Inferno mode.
Munin
 The instances merchant, Munin, located at /navi ve_fild07 113/141
Gluttony Crown


Gluttony Gemstone exchange
| Item | Materials |
|---|---|
| Sealed Gluttony Crown
|
100x  Gluttony Gemstone Gluttony Gemstone
|
| Gluttony Essence
|
1x Gluttony Gemstone
|
| Gluttony Fragment
|
1x Gluttony Gemstone
|
Gluttony Fragments exchange


Special refining
coming soon
Enchant
coming soon
Cards
When your party got at least S rating, cards have a chance to appear while opening the Treasure Box. The  Gluttony Beelzebub Card can only be obtained if you choose the Inferno mode (2% drop rate). On normal mode, only
  Gluttony Fallen Bishop Card can dropped (1% drop rate). While the other card got the same rate on all mode, 5% drop rate (for normal card, drop rate can't be increased). While Gluttony Beelzebub Card and Gluttony Fallen Bishop Card drop rate will increase by 0,5% for each SS and SSS, max total drop rate 3% on Inferno mode.
| Card Art | Cards | Description |
|---|---|---|

|
Gluttony Beelzebub Card
|
Increases magical damage against Demon and Angel race monsters by 50%. When equipped with Ruler of the Otherworld, When equipped with Ritual of Evil Spirits, Type : Card |

|
Gluttony Fallen Bishop Card
|
Increases magical damage by 10%. Increases magical damage against Demi-Human and Angel race monsters, and Doram players by 50%. MaxSP - 50%. When equipped with Ruler of the Otherworld, Type : Card |

|
 Gluttony Hell Fly Card Gluttony Hell Fly Card
|
Increases magical damage by 5%. For every refine level, increases magical damage by an additional 1%. When refined to +7 or higher, enchants the armor with Undead property. Type : Card |

|
 Gluttony Hell Poodle Card Gluttony Hell Poodle Card
|
Increases HP recovery received from healing skills by 10%. Type : Card |

|
 Gluttony Ghoul Card Gluttony Ghoul Card
|
Reduces damage taken from Neutral property attacks by 15%. For every refine level, increases Poison property magical damage by 3%. Type : Card |

|
 Gluttony Zombie Slaughter Card Gluttony Zombie Slaughter Card
|
Increases critical damage by 3%. Restores 200 HP when defeating a monster with a physical attack. When equipped with Gluttony Ragged Zombie Card, Type : Card |
|
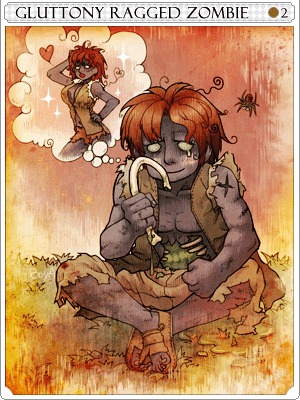
 Gluttony Ragged Zombie Card Gluttony Ragged Zombie Card
|
Increases critical damage by 3%. Restores 10 SP when defeating a monster with a physical attack. When equipped with Gluttony Zombie Slaughter Card, Type : Card |

|
 Gluttony Necromancer Card Gluttony Necromancer Card
|
Ignores 10% of the MDEF of monsters of all races. When refined to +7 or higher, ignores an additional 15% of the MDEF of monsters of all races. When refined to +9 or higher, ignores an additional 25% of the MDEF of monsters of all races. Type : Card |

|
 Gluttony Flame Skull Card Gluttony Flame Skull Card
|
When receiving physical damage, has a chance to inflict Blind, Stun, Stone Curse or Curse on the attacker. Type : Card |

|
 Gluttony Banshee Card Gluttony Banshee Card
|
Increases Soul Expansion damage by 10%. When refined to +7 or higher, increases Soul Expansion damage by an additional 15%. When refined to +9 or higher, increases Soul Expansion damage by an additional 25%. Type : Card |